

So, you are writing an amazing post about some topic and thought to add some images to it. As soon as you try to upload an image, you get an error saying that it’s an HTTP error. What do you do in such a situation? Well, you will surely opt for help, right?
That’s why we are here with the ultimate list of solutions you can try to fix HTTP error when uploading images in WordPress. We surely know how irritating it can be when you are trying to upload the image and it doesn’t work.
Overview of the HTTP Error
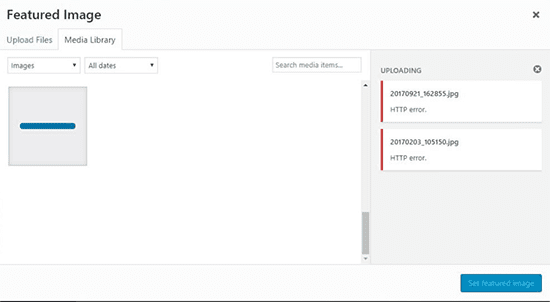
This error usually comes when you are trying to upload an image to your WordPress directory. When you are trying to upload the image, you will see this error.
There are various reasons for this. Sometimes, it will just show the upload failed error, and sometimes it will show you the HTTP error. Although both of these are different you can surely use the same techniques to fix this issue. So, we will now begin the method to solve this and upload the image without any issues.
You can use any of these methods to solve it. We will see more than one method. Different methods might work fr different people. So, you can surely try all of them and then decide which one is for you.
How to fix HTTP Error when uploading images in WordPress?
Now, we will see how you can fix HTTP error when uploading images in WordPress. We will be seeing all the ways to fix this issue.
Before we get into anything, make sure you have a proper backup of your website. In this way, you can restore the backup whenever you want. This is a very helpful thing when you mess up or something goes wrong.
Therefore, take a backup before we continue to the article. With that being said, let’s continue to the article and see the possible ways to fix this error.
This goes without saying but the first thing that you need to fix this error is to refresh the website again. You can refresh the page and try again. Further, you can also try uploading the image from the media library.
Rename the File
Your next job to solve the error is to rename the file. Yes, it might sound so simple but it works and might solve your error in no time.
All you need to do is rename the file. Sometimes, the image file will have an unknown or special character. Generally, WordPress won’t allow these types of files. So, they might be showing the error instead of allowing you to upload the file.
You can rename the file and change it to a normal name. After this, try uploading the file again. This might work in most cases.
If there are more images, you can try changing the name from the file manager if you don’t want to upload all the files again. Further, there are Windows or Mac tools available that allow you to bulk change the name of your files. So, if there are more files, you can do this too.
Shrink the Files
Your next job is to try shrinking the file. In simpler words, you can try compressing the size of the file.
If your file size is too big, it will show you an error. So, you can try shrinking the file and then trying again.
Many online tools will help you to compress the files. You can use any of the tools to do it.
Once you compress the file, you can try again. When you captured the photo in DSLR or any huge camera, it will take a lot of space. The same goes for the created graphics. For example, if you have used a lot of HQ images in your final Photoshoped image then the size will be too large.
You should save the image as online publishing. This will reduce the size of the image.
Alternatively, you can surely use one of the online tools to compress the files and try uploading the file again.
This will work for most of the websites. If this method doesn’t work, you can surely try increasing the memory limit of your WordPress.
Memory Limit
By default, WordPress allows limited memory to be executed on the server. For example, the website script will only run for a while. If the memory is exceeded then it will show you the error.
Therefore, you can try increasing the memory limit of your WordPress website and then see if it has fixed HTTP error when uploading images or not.
To do that, you will need to open your file manager. When you open your file manager, you can open the WordPress directory and head over to the wp-config.php file. You can hit the code edit button and it will open the file.
You will have to add the following line inside it. Please note that you can add it anywhere you want inside the file.
define( 'WP_MEMORY_LIMIT', '256M' );
Once you add the code, you can save the file and try uploading the image again.
Please note that you don’t need to remove this line even if it doesn’t work. Increasing the memory limit is always beneficial and will help you in many ways. So, you can surely keep this as it is.
Moving on to the next, we have another thing that you can do to increase memory. You can increase the PHP version.
To do that, you will have to open “Select PHP Version” from cPanel. Increase the version to the latest one. If you are using WordPress, you will face no issues and the error will be solved.
However, if you are using any other script as well, you will have to make sure that the code of that website is compatible with the latest version of PHP. This is something that you need to keep in mind.
Troubleshooting the Plugins
If none of the above methods work, it is time to start troubleshooting with the plugins. One of the plugins might be causing the issue.
If you already have a plugin for the image, you can try deactivating that plugin and then try again. Also, for the people who recently added a plugin, you can try deactivating that plugin and see if it fixes the issue or not.
Moving forward, the next plugin that you can deactivate is the cache plugin. Sometimes, the cache plugin might be giving the issue. The same goes for the security plugin too.
If nothing works, here is the ultimate solution for this. You can deactivate all the plugins. Don’t worry, we won’t keep the plugins deactivated. We will soon activate it.
Now, you can try uploading the image.
Thereafter, you can activate all the plugins back again and try uploading the image again. In most cases, it will be working for both of them.
So, if that’s the case, you don’t need to worry anymore.
However, if you were able to upload the image after you deactivated and when you activated back, your upload failed. You can try troubleshooting the plugin manually by activating them one by one or you 2/3 plugins at a time.
On the other hand, if it failed in both of the cases, you can try the same thing with the theme.
Try reverting to the old theme and see what’s the result.
As we are in the plugin section, let’s share one more trick. You can install plugins like Media library or add from the server which will allow you to upload the images directly to the server.
The GD Library
WordPress gives two libraries to edit the images or upload them. Most probably, you are using the default one. You can surely change it to the GD Library.
To do is, add the following line in the .htaccess file in your file manager. It will be in the root directory. If you can’t see it, you can go to settings and then click on “Show hidden files”.
Add the following line inside it.
MAGICK_THREAD_LIMIT 1
Next, go to wp-content/themes. Now, open your theme and head over to the functions.php file. You can check if the uploading works before adding this line. In some cases, you don’t need to add these lines.
Add the following line there.
function hs_image_editor_default_to_gd( $editors ) {$gd_editor = 'WP_Image_Editor_GD';$editors = array_diff( $editors, array( $gd_editor ) );array_unshift( $editors, $gd_editor );return $editors;}add_filter( 'wp_image_editors', 'hs_image_editor_default_to_gd' );
Final Words
To conclude, these are some of the best ways to fix HTTP error when uploading images in WordPress. In the end, if none of these techniques to fix HTTP error works, you can contact the hosting support. The hosting support will surely tell you what to do next or they will fix the issue. If you want, you can also check the server logs manually and see what’s the error about. You can then try to fix that file. Lastly, it is surely your choice, you can follow any method you want.


