

PayMill payment gateway is one of the best payment gateways you can use if you want to accept payments on; line in the easiest way possible. Currently, it’s one of the major payment methods used in Germany, Austria, and Switzerland. If you have major visitors and traffic from these countries, you can surely use the payment method to increase the number of sales. If you use the right payment methods, you will see an increase in sales. Therefore, if you are not using the best Paymill method for WooCommerce, you are already missing out on a lot. Who knows, you might already have lost some of the sales.
So, it’s the right time that you can set up a PayMill gateway for your WooCommerce store.
What is PayMill?

PayMill is a payment gateway that you can use for to accept the payment from people in your eCommerce store. They have made the work a lot easier and allows the customers to make the payment with ease. You can easily set up the payment gateway and in the same way, the customers can directly use their favorite payment method to make the payment.
It allows you to accept payments in various ways, credit card being the most used method. We will surely see more about it as we move on in this article.
PayMill allows you to integrate their payment system with WooCommerce. This will make a lot of work easier and automated. One can make the payment in your store, PayMill will automatically confirm the payment. If the payment was successful, they will simply mark the order as payment complete. You can turn on the notification if you want to know more about this. Therefore, it’s one of the best payment methods you can use.
PayMill for WooCommerce
When it comes to WooCommerce, there might be some things that some people won’t like. At first, they don’t have any official plugin that you can use. Most of the payment methods have their plugin that you can use. You don’t need to use any third-party plugin. However, that’s not the case here.
There was a plugin that was available in the official store of WooComemrce but it’s not supported. In simpler words, you can no longer download and use the plugin. So, you will have to use the third-party plugin available in the WordPress directory.
Luckily, there is a plugin that you can use to accept the payments directly from PayMill. As of now, the plugin is not yet updated to the latest version. There might be a small issue that you will find here. For example, as the plugin is not updated, you might find certain compatibility issues where the plugin is not compatible with some of the extra features. However, this only applies if you have added some of the extra options for the product. In that case, you will have to test it yourself and if there are some problems, you will have to deal with it all by yourself. Therefore, this is a major issue that you will see.
Further, there are some security risks too. This goes without saying, If a plugin is a note updated for a while, there are some of the potential risks that you might find here. Therefore, you will have to make sure that the payment method you are using is secure. You can surely use other security methods to overcome this. For example, if you have a standard security plugin, this will not be a big issue. They can easily detect if there are any potential vulnerabilities in your website.
Features
We will now have a look at some of the interesting features that are offered by PayMill for WooCommerce. You will get all these features if you are using PayMill as your payment gateway. Therefore, make sure you read it carefully.
Payment Methods
You can accept the payment from all the major credit and debit cards. It not only allows you to take the payment from Visa and Mastercard but you can also make the payment from many other credit cards. This will also include a debit card. So, it doesn’t matter whether the customer has a credit card or they are using a debit card, you can surely use it to accept the payment on your website.
It allows you to accept PayPal. One of the best features for all the Europen people is that here you can also accept the money from SEPA debit. It’s a pan-European debit system that allows you to accept the payment from anywhere. This is one of the most popular methods in Europe. If you accept it in your store, this will surely impact your store. So, you can think more about it and then implement it.
Support and Security
The security of the plugin is great. You will get advanced security here. Like you already know, the EU takes all the proper care of your security. So, you surely don’t need to worry about the security or privacy of your data. All your data is completely safe here. The payment gateway has been in the industry for quite a bit. It can surely handle all the security of the plugin.
You can be stress-free as they have your back. You can surely rely on that. However, the plugin is not that secure. We have already done a complete discussion on this when we were in the previous section of WooCommerce. So, we won’t discuss it all again.
Local Payments
The good thing is that you can accept local payments here. By local payment, we won’t mean to say that you can accept the offline payment but it’s more about giving the perfect payment method for the people who want it. Here, you can accept payment using SEPA debit. Like we mentioned, it’s a popular payment method in Europe where you can accept money with ease.
However, there are very few payment gateways like PayMill which allows you to accept the payment using that particular method. So, you can surely use that here. If you are based in Europe, you can take the advantage of this to get over your customer. You can simply start accepting the payment using SEPA debit. If your competitor isn’t accepting the same, you will get more sales than them. This is how you can steal the game from them just by adding a new payment method to your website.
What are the Requirements for adding Paymill to your WooCommerce platform?
Now, we will have a look at the requirements you will need to fulfill before you make any changes in your payment methods. In simpler words, these are the things you will need if you want to use PayMill.
- Your website must be ready and working
- It will be great if your website is GDPR compliant. So, make sure you are taking the consent of the customers before you take any of the data from them. This is a required part if you do not integrate the payment gateway.
- You will need an active account on the PayMill website. You can simply head over to the official website and then you can create an account there. It will hardly take few minutes and you are all done. This is the way you can easily get started.

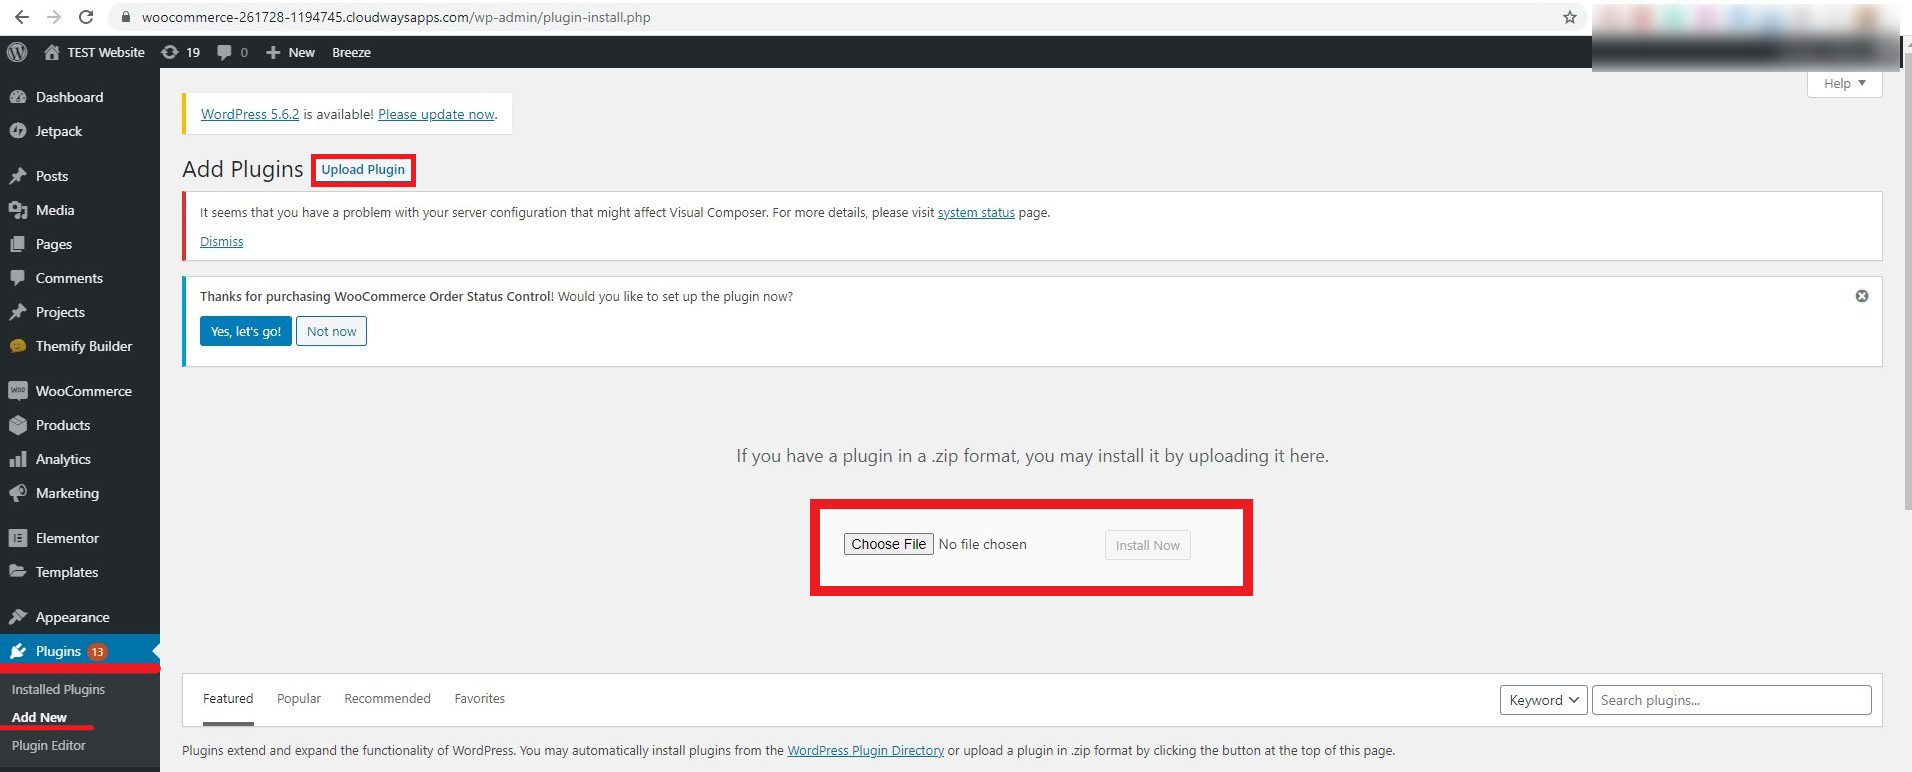
- Lastly, you will need the plugin. The plugin was available on the official website of WooCommerce but now it says the plugin is retired. Luckily, there is a solution for this. Now, you can install and activate the payment plugin from the official website of WordPress. In simpler words, you can head over to the Add Plugins option in your WordPress website and then look for PAYMILL for WordPress. You will easily find the plugin. You can simply install and activate the plugin to get started.

Once you have done all these things, you are all set to do the configuration of the plugin and set it as an active payment gateway for your website. Don’t worry, we will not abandon you from here. We will now see how you can configure the plugin.
Configuring PayMill for WooCommerce
We will see how you can configure the PayMill payment gateway for your website. We will see the exact steps that you need to follow if you want to set up and configure the payment method for your WooCommere. After the configuration, you can easily accept the payments online using this payment method. So, make sure you follow this complete tutorial if you are planning to add the payment method to your website.
Getting things Ready
This is the place where we will quickly prepare for the configuration. You need to make sure that the plugin is installed and activated. If you have not yet activated your plugin, you can simply head over to the “All plugins” option and then activate the plugin.
We will now also log in to the payment website. So, you can simply open the official website of PayMill and then create an account. You can easily create an account and then you can log in. If you have been following our guide, you surely might have created your account earlier. If you have not yet created the account, you can create the account and then login. This will make things easier when we start the configuration.
So, without wasting any further time, let’s get started in the configuration part and see what are the things you will need to have to start the configuration of the plugin.
Configuration of the Plugin
You can easily configure Paymill for WooCommerce by heading over to the payments option. You can simply head over to the payment page by heading over to the WooCommerce > Payments. When you open that page, you will see all the things that you will have to enter. Not to mention, you will first have to open PayMill from the list of payment methods. When you head over to the payments page, you will see a small list of payment methods. Find PayMill from it and then click on it.
The next step is where you will have to enter the API details. You will find a small link somewhere on the plugin page. Generally, it will be right below the API field or above it. You can simply click on the link given and it will display the API key. Please note that you will have to allow the plugin to use the payment service. You can simply follow the steps on the screen. They are easy to follow.
Thereafter, you will have the API key. Once you have the API key, your next job is to select the payment methods that you want to use.
PayMill offers various payment methods. Luckily, the plugin gives you the option of which payment methods you want to apply. You can simply select the ones that you want to use and uncheck the methods that you don’t wish to use. With these easy steps, you have configured the plugin.
Test the Plugin
You can now test the plugin. Make sure you have enabled the plugin when we analyzed the previous steps. If you have not yet enabled the plugin, you or your customers won’t see the PayMill payment method as one of the options. So, make sure you have enabled it. Thereafter, you can test the payment method.
Please note that it’s important to test this plugin as it’s not updated recently. If the plugins are regularly updated, we can be sure that they are working. However, that’s not the case here. So, make sure that you check the plugin properly. If you add a more plugin to your WordPress website that can cause issues in the payment, you can test the plugin again after you have installed that plugin.
Final Words about PayMill for WooCommerce
To conclude, this is how you can easily add a PayMill payment gateway to your WooCommerce website with ease. You can simply follow the steps and you will have the new payment method ready to use.


