

Elementor parallax background is one of the most perfect designs that you can set. Here, the concept is simple, the background of the page moves a little bit slower than others. Therefore, the users will get a whole new effect. It looks like a small 2D Space. The good thing is that you can use various effects here. You might have seen many websites where you might have seen changing backgrounds, etc. Well, all those things can be archived by doing an Elementor parallax background. We will see the same thing here. The guide will cover everything you need to know about the parallax background and how you can set it.
Overview of Elementor parallax background
We will begin with the overview of Elementor parallax background. There are many things that you need to know before you can start making the changes. So, you can always see all these things.
At first, you need to know that there are many ways you can give the parallax effect. One of the simplest ways to give the parallax effect is to set the background as steady. So, when you scroll the page, it will just scroll the content and not the background. This will give you a nice effect as the background is ready and the content keeps moving.
This can be done using the free version of Elementor. You don’t need the pro version to do this. Therefore, many people love doing this and they prefer to do this.
Now, if you don’t want to do this. There are many advanced ways to do the Elementor parallax background. You might have seen some websites where the background character is animated or you might have seen the background changing colors.
For that, you will have to use the pro version of Elementor. You can’t do it with free Elementor. You can simply buy the pro version of Elementor.

How to Add Simple Elementor parallax background?
Like we mentioned earlier, we will first see a simple way. Here, we will see how you can easily add the Elementor parallax background.
This is the only method that you can use in the free Elementor. For all the rest of the methods, you will have to pay for the pro version. Therefore, this might be useful for many people who want to have the Elementor parallax background.
Set the Background
The first thing you need to do is to set the background and do all the content. You can create the page just like you do normally. Thereafter, you can add the background image and then add all the content in there. Once you do that, you can then set the background as the parallax background.
Change the Background Image Settings
In the next step, you will have to change the background image settings. For that, you will have to start by clicking on the section where you have added the background.
Simply head over to the “Style” and there you will see various options. You will have to click on the background option.
At first, you need to ensure that the image size is set to “Cover”. If it’s not cover, the image will not look good. So, you can set it as the cover image. Depending on your image, you can also set another size. However, a cover image will be the best choice for everyone.
Thereafter, you will have to make sure that the “Attachment” option says “Fixed”.
In most cases, both of them will be the default. You will have to change it to the recommended one.
Please note that all these changes should be made in the background and not in the background overlay. If you are using the background overlay, there won’t be a proper Elementor parallax background. Therefore, you can shift to the background.
Once you have set all these things, you can simply save the changes and check out the page. You will see the page is working fine.
Setting up other Elements
Now, it’s time to set up and use other elements and set the configuration for them.
You will have to ensure that you are using the right alignment for the elements. For instance, if you have a cup of coffee on the left of the background image, you will have to ensure that the text is on the right.
For that, you can easily head over to the settings panel and set all the things.
Many people want to play around with the text or any other elements above the Elementor parallax background. So, you can go to the advanced panel and then head over to the custom positioning. This is where you can play around.
There are many options that you can try. To begin with, you can set the position as “Fixed” and then change the horizontal alignment or vertical alignment. In the same way, you can also set the offset individually.
Once you have all the things saved, you can test our page and see how the Elementor parallax background looks.
How to set up Elementor parallax background in Elementor Pro?
Now, we will see the advanced version of the Elementor parallax background. Here, we will see how you can set up the complete Elementor parallax background. This is the right way to set the parallax effect. Here, you will get a lot more customization ability than the previous one. Therefore, this is the most preferred one that people use. You can also use the same and set up the complete Elementor parallax background.
As this is one of the pro tricks, you will need Elementor pro if you want to try out this thing. You don’t need any other plugins here. Make sure that you have Elementor pro activated and then you can follow these steps.

Set the Elements
The first step is simple. You will have to set up the other elements. If you want to create a page, you will have to set up the background and other elements.
You can search for the best background image that you can use here. Once you have it in your mind, you can set up the image in the background.
Setting the Motion Effects
Motion effects were the reasons why you needed Elementor pro. To do a complete Elementor parallax background¸ you will need to mess around with the motion effects.
For that, you can simply head over to the advanced panel where you will find the option for Motion Effects. Motion effects are the option from which you will be able to make the changes.
Turn on the motion effects and you will start seeing a few options that you can set.
Now, to begin with, there are many Elementor parallax background options here.
The basic and the simplest options are 3D Tilt and entrance animation.
You can turn on the 3D tilt. It will tilt the element a little bit which will make it look like a 3D object. You can always set it and then head over to the entrance animation.
The 3D tilt option will also ask for you to set the direction. So, you can set your desired direction and then save the changes. Once you have the direction ready, you can set the speed of the animation. After setting the speed, you are all set.
Entrance animation is not a huge thing that you will see here. There are already many people using this. Many people don’t even consider it in the parallax effect.
However, it will surely change the look of the website and will make it more awesome. So, you can surely try that.
Mouse Effects
You can also set up the mouse effects when you are using the Elementor parallax background. The mouse effects will move the element in the direction of the mouse or will move it in the opposite direction.
In the same panel, you will also find the option to set the mouse effects. You can set the mouse effects from there. It allows you to set the direction, speed, and there are other settings that you can use.
Make sure that you open the page in the new tab and keep checking the page to make sure that it looks good.
Scrolling Effects
Elementor parallax background is all about the scrolling, right? So, why not add some scrolling effects to it to get the best feeling.
You can also set up the scrolling effects. For instance, if you want to move the character a little bit to the side, you can set up the scrolling effects.
Here, you can also set the anchor point and move the element in the way you want. For instance, if you have a PNG image of a girl in a car and you want to move the image backward to get the feeling of a moving car. You can do that too.
There are all the options available. It’s a huge topic and we will surely cover it in a different section to play around with the scrolling effects. As of now, you can set up the anchor points and set the direction.
This will give you the effect that you want without any hassle. Therefore, you can surely try this out and then check the page again to see how much progress you have made.
Play around with Positions
In the advanced panel, you will also see an option for the position. You can set up the position for the elements. Usually, the elements are in the fixed or default position. Sometimes, you might want to change the position from default to absolute. This will also allow you to set the element in the way you have set the Elementor parallax background.
So, you can surely change the position as well.
Use JetElements For Elementor parallax background
Many people are still not satisfied with the amount of Elementor parallax effects. In that case, you can always use a third-party plugin. JetElements is one of the coolest plugins you can use for advanced parallax effects.
There are many advanced effects that you can use here. For that, you will have to install a third-party plugin. The plugin we will use here is JetElements. It is a paid plugin that has many effects that you can use for the animation.
You will have to purchase the plugin and then activate it to start using it.
Once you activate it, you can then set the basic things at first. This is where you can create the page and add the elements. Thereafter, you can set the Elementor parallax background.
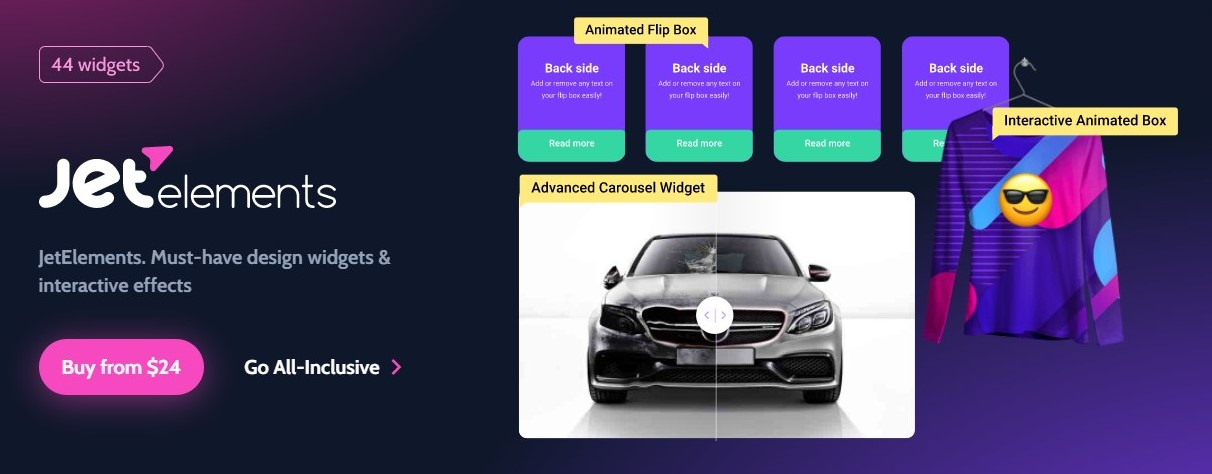
Elementor parallax background using JetElements
JetElements allow you to have various parallax effects. Here, you can set many parallax effects.
To name a few, we will see some of the best effects that you can use.
- Vertical Scroll
- Horizontal scroll
- Scrolling zoom
- Scrolling rotate
- Mouse move
- Blur
- Opacity
- 3D
Now, if you want to use the best Elementor parallax background¸ you can surely use 3D, Scrolling rotates, or you can also use the mouse move. Alternatively, these options can be found in the Elementor Pro version in the motion effects section.
So, you can set all the options here. All these options are available in JetElements. You can also set the direction, speed, and set other options to give the Elementor parallax background a perfect look. Make sure that you have selected the right background image when you are editing it.
Final Words
To conclude, this was all about the Elementor parallax background and how you can set the Elementor parallax background. You can easily give the parallax effects by making the background steady in the free version of Elementor. For the pro version, you will have to head over to the motion effects from which you can make all the changes. Last but not the least, you can surely use JetElements if you don’t want to spend more money on the pro version and just want to use the Elementor parallax background. This is how you can make your web page more beautiful.


