

In this tutorial, we will take a peek at how to integrate ACF with Elementor. Year after year, since its inception, WordPress page builder plugin Elementor has experienced a steady incline in popularity, most notably, its ability to easily integrate other powerful plugins, for instance, Advanced Custom Fields(ACF), has been a paramount feature, greatly appreciated by web developers and designers across the world. In this article, we will take a look at the basics of Advanced Custom Fields(ACF), how it integrates within the Elementor’s environment and what possibilities it offers for the average user. ACF is a plugin with considerable history in the world of web design. Together with a powerful design tool as Elementor, ACF’s capabilities are greatly enhanced.
ACF Synopsis
What is the Advanced Custom Fields(ACF) plugin? In a nutshell, ACF is a plugin that allows the user to add custom meta fields on WordPress Pages and Posts and control the flow of content with relative ease. Basically, it uses custom post meta in order to augment your content with anatomically structured data. A more advanced feature ACF offers is the ability to group your custom data fields into meta boxes. As time goes by and your experience grows, you will see that ACF is an instrumental part of many websites. It enables web developers to quickly and efficiently change any associated content. If your client has all of a sudden requested for significant changes to be made, then you can conveniently make these adjustments without wasting precious hours. Now, let us take a look at how the ACF works together with Elementor.
Benefits of Using ACF Together with Elementor
Historically, the greatest obstacle for any page builder has been the fact that they are static. Dynamic content could not be displayed and everything had to be done manually, page by page, post by post. But the latest versions allow for dynamic content to be added in a way that is both responsive and easy to manage. Pairing Elementor and ACF together has never been easier.
You can create templates with Elementor that make use of ACF’s meta fields. By adopting such amalgamation, we can replicate data with a few clicks of a button instead of manually editing every page or post. Progressively more web agencies take advantage of this feature as it increases the workload an agency can carry and enables greater freedom during the design process. Many agencies nowadays use Elementor together with ACF as it endows them with the opportunity to sell mid-range sites that are custom in their nature, but not overly customizable, thus making the product more cost-effective and easier to maintain. Honestly, we are just scratching the surface of what ACF can really do when paired with Elementor.
ACF Basic Use with Elementor
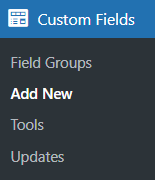
Let us start with locating the ACF panel in the WordPress dashboard. Look for a menu item “Custom Fields”, after clicking on it, you will be presented with a dropdown menu with several options: “Field Groups”, “Add New”, “Tools” and “Updates”. Subsequently, after clicking on the “Add New” button, you will be redirected to the Field Group window.
Now you are able to see the full extent of the possibilities ACF offers. Firstly, you should start with a Title for your new custom meta field in order to effortlessly navigate through your future content. Secondly, you should add a new field and fill it with the necessary information. The latest version of ACF (5.0) has introduced new field types for the users to interact with. With over 30 in-built field types and hundreds of user-created field types, custom field management could not be more straightforward.
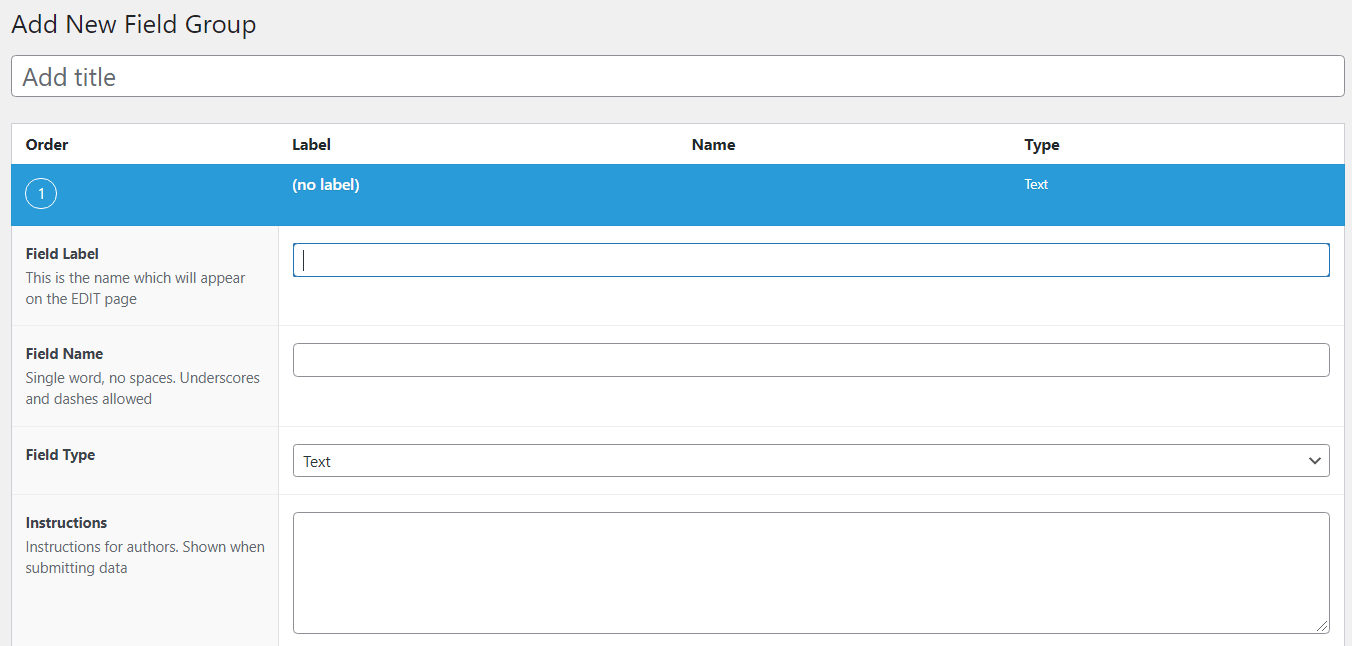
Thirdly, you can apply Conditional Logic to your field in order to set conditions in accordance to the input data. It is a highly appreciated function as it authorizes us to sort and group a large quantity of data with relative simplicity.

Fourthly, you would want to create a set of rules for your Field Group. By applying simple conditional logic to our Field Group, you can decide where and how to display your input form.

Now that we have finished setting up our first custom field with ACF, we should give an eye to how it interacts with Elementor. The aforementioned page builder Elementor has organized the ACF integration with enormous success. One could even argue that out of all page builders, Elementor has handled it the best. It used to be a dream for web developers to create dynamic content without coding, now, it is a reality for all of us.
Post types and ACF
It is important to distinguish two common post types used in web development: Posts and Pages. Although similar, Posts are chronometrical listings, but Pages are hierarchical in their structure (parent > child, etc.). Posts make use of taxonomies, for instance, Tags and Categories, while Pages do not. The dissimilarities become apparent with enough experience. Why is it so important to understand the difference? Well, if you are not well-versed in coding and have just begun your web design journey, then these are the post types you will have to work with. There are close to infinite possibilities of post types one can develop through coding and smart use of plugins, but we will cover this in another extensive blog post. Now, let us see how Elementor integrates ACF into its design.
Elementor “Theme Builder” and ACF
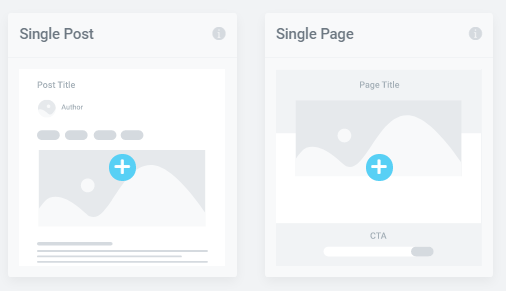
The power lies within the Elementor “Theme Builder”. Creating a template for a reoccurring page or post has made web development a lot more accessible to new professionals in the industry. Elementor “Theme Builder”, when paired together with ACF, allows us to quickly edit essential content without coding. Start by creating a template for a Single Page or a Single Post. Use the Elementor Widget Panel to access numerous design features and complete your web page’s design. After completion, you can fill the content as you see fit by using the Dynamic Tags. Almost any Elementor widget with some kind of input supports the Dynamic Tags option, for instance, the Heading widget.
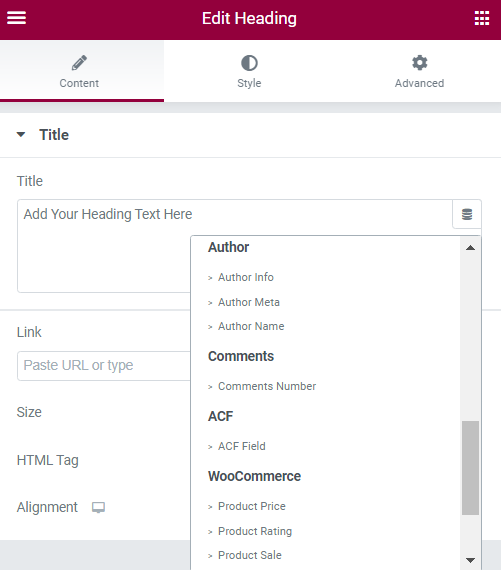
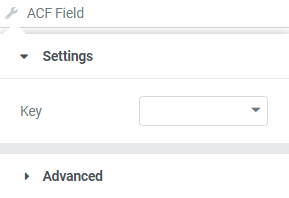
In the Widget Panel, underneath the Content section, you can see the Title input window. In the upper right corner, you can identify the Dynamic Tags icon. After clicking on it, you will be presented with a dropdown list of various input data types. Let us find the ACF Field option and click on it. You may have noticed that nothing changed. As with any dynamic tag, it requires you to click on it again, so you can choose and set the ACF Field’s settings. Now is the time to use the ACF data from previous steps and put it to good use. You can choose what kind of input data you want to display and under what conditions it will appear. With enough fiddling around you will get the hang of it and be able to organize vast blocks of information without any difficulty.
Custom Field Types in ACF
As you are aware by now, the main strength of ACF is the ability to create custom fields and merge them into complex forms. Elementor allows us to display these forms with minimal effort from the design team. ACF, as a plugin, is a highly capable tool in the hands of someone who knows how to capitalize on its features. With smart use and ingenious approach, you can go well beyond the standard WordPress limitations and develop forms capable of processing vast amounts of information. And the most beautiful thing is that it can be done without writing a single line of code. But in order to be able to do this, you should be familiar with all of the custom field types. Here is a full list of all of the custom field types:
- Text — Single-line text field with optional HTML support and character limits
- Text Area — Same as Text but can have multiple lines
- Number — Number field that can have optional min/max values for limits and validation
- Email — Custom field for email input including validation
- Password — Password input with text masking
- WYSIWYG Editor — WordPress editor input with options for media insertion and editor buttons
- Image — Upload an image or select one from the media library. Returns an object, URL or ID
- File — Same as the image but for files in general
- Select — Drop-down menu with support for multiple selections
- Checkbox — Checkbox field for single or multiple items
- Radio Button — Pick a single item via radio button
- True / False — Basic true or false selector
- Page Link — Returns the URL of any post or page.
- Post Object — Returns a WordPress object of any post or page, post type or taxonomy
- Relationship — Same as post object but with an advanced interface and reordering via drag and drop
- Taxonomy — Returns an object or ID for one or more taxonomies.
- User — Select one or more users. Option to limit choice by user role
- Google Map — Set a center, zoom level and width
- Date Picker — Select a calendar date and return a formatted date string
- Color Picker — Select a hexadecimal color
- Message — Leave a message
- Tab — Combine fields into a tabbed interface
It is hard to envision a situation where you would not be able to create custom forms with these field types. With no coding involved, you will still be able to make WordPress websites with comprehensive databases. It is important to note that by using ACF and Elementor, you will not need to tamper with any core files, thus ensuring that the security of the website is not compromised.
![]()
ACF PRO
By now, you must be well aware of what ACF is adept at. Even though the free version offers us plenty of features to work with, the premium version ACF PRO presents us with additional attributes we can use in web development. Upgrading to the paid version gives us access to additional field groups:
- Repeater Field – Repeating content, for instance, think slides, team members, CTA tiles, etc.
- Gallery Field – Interactive interface for managing a collection of attachments
- Flexible Content Field – Simple, structured, block-based editor which uses layouts and subfields in the design process
- Clone Field – Selects and displays existing fields. It does not duplicate any fields in the DB, instead, it loads and displays the selected fields at run-time
Field types like Repeaters and Gallery are very common in the web development world. Almost any website makes use of them in some way or another, so it is highly recommended to gain access to them.
Another premium feature worth mentioning is the ACF Blocks. Custom block development has always required a proficient knowledge in both PHP, JavaScript and, especially, React JS. – the JavaScript framework. In this instance, ACF Blocks serve as an intermediary for developers. You can effortlessly manage and develop content without meddling with the back-end part of the site. Implementing your blocks within the Elementor page works the same way as we described before.
ACF PRO also brings numerous other improvements to the table. More fields use Ajax powered search, new PHP actions and filters have been added, redesigned auto export to JSON feature, improved form validation, better front end forms, etc. Certainly, this is one of those premium plugins, that is well worth every cent and works together flawlessly with Elementor.
Final Words
ACF is profoundly being used in the WordPress community, with more than 2 million active installations worldwide. By being able to integrate ACF features within Elementor, you are able to swiftly design and manage blocks of content and adjust the input data to the site’s needs. ACF paired with Elementor is a powerful duo and, probably, will continue to be a staple part of the WordPress page development. Do not underestimate the sheer amount of prospects the premium version can introduce. Just having access to a simple field type, like Gallery, can greatly enhance the content of your WordPress site and make it more manageable. We hope that you have grasped how Elementor integrates ACF in this short overview. Understanding how ACF works is instrumental to a web developer as you are bound to stumble upon it every now and then. Take care!
Frequently asked questions
How does Elementor integration with Advanced Custom Fields (ACF) enhance website development?
Elementor integration with Advanced Custom Fields (ACF) enhances website development by allowing designers and developers to create highly customized and dynamic content layouts using Elementor’s intuitive drag-and-drop interface combined with the powerful data management capabilities of ACF. This integration enables seamless integration of custom fields and data from ACF into Elementor, providing greater flexibility and control over content presentation and user experience.
Can I use ACF’s custom fields with Elementor’s dynamic content features?
Yes, you can use ACF’s custom fields with Elementor’s dynamic content features to populate dynamic content elements such as text, images, links, and more with data stored in ACF custom fields. Elementor’s dynamic content functionality allows you to dynamically insert content from various sources, including ACF custom fields, into your designs, providing dynamic and personalized content experiences for your website visitors.
Are there any limitations or considerations when using Elementor with ACF?
When using Elementor with ACF, it’s essential to consider any limitations or compatibility issues that may arise, particularly when working with complex custom field configurations or third-party extensions. While Elementor’s integration with ACF is robust, certain ACF field types or configurations may not be fully supported or compatible with Elementor’s design capabilities. Additionally, ensure that you’re using the latest versions of both Elementor and ACF to minimize compatibility issues and take advantage of the latest features and improvements.
How can I ensure smooth integration between Elementor and ACF during website development?
To ensure smooth integration between Elementor and ACF during website development, follow best practices such as properly configuring ACF custom fields and field groups, organizing your custom field data logically, and understanding how Elementor interacts with ACF data sources. Test your designs and dynamic content elements thoroughly to verify that ACF data is displayed correctly within Elementor’s design environment and across different devices and screen sizes.
Can I revert changes made with Elementor and ACF back to the original state or previous version?
Yes, you can revert changes made with Elementor and ACF back to the original state or a previous version by using Elementor’s revision history feature or restoring backups of your website. Elementor’s revision history allows you to view and revert to earlier versions of your designs, including changes made with ACF custom fields. Additionally, if you’ve saved backups of your website’s database or files, you can restore previous versions to undo changes made with ACF and Elementor.


